
I love to share my art skills and teach others, so I was definitely in my element last week in Portland. The one-day class I taught (titled Black, White & Red All Over) was great fun filled with 11 enthusiastic participants. We were all there to spend the day drawing and making patterns to create art. I was delighted to see how everyone in the class took to this method of making art so easily. But why not? In our early years we all start drawing and doodling, although I do not choose to use the word "doodling" in my creations.
 |
| Starting Shapes to Fill with Patterns |
 |
| Making Patterns |
 |
| Patterning on Subject Matter |
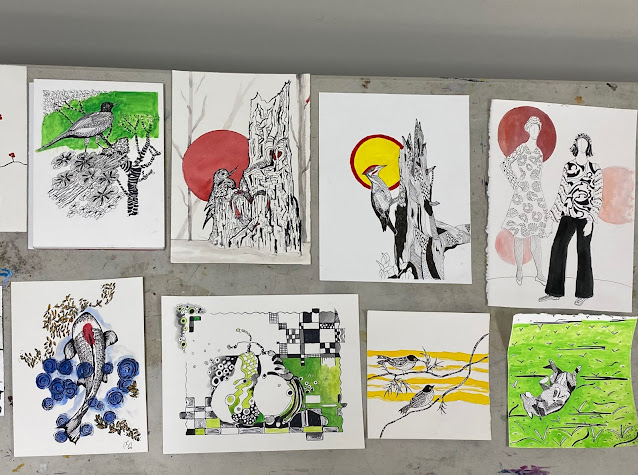 |
| Some Finished work |
 |
| King of the Couch |
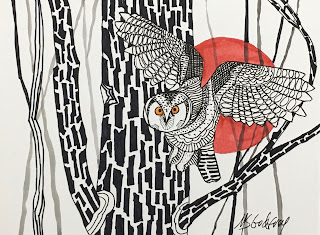 |
| Suzy's Owl |
One of the class members decided to purchase this guy in flight. I signed it and christened it "Suzy's Owl." He will find his way to Sun River!
Why Owls?
I have been thinking about this lately. I have heard owls hooting through the night, but have rarely spotted one with my eyes. Yet they seem so lovely in my fire inspired art.
"Owls represent wisdom, knowledge, change, transformation, intuitive development, and trusting the mystery. They are tied to the spiritual symbolism of “death” which brings about new beginnings with a higher understanding and evolved perspective. Owls can show up when you are being asked to listen to your intuition." Gleaned from the internet.
"Change, Death and New Beginnings" seem to apply to my life of the past 15 months. The Holiday Farm Fire brought a forced change, death to our home, landscape and plant-life, and New Beginnings as we forge ahead with a new home and regrowth of our beloved McKenzie Valley.
Happy Holidays to one and all!
The Star of Hope


